PostgreSQL is an open-source, relational database management system. Through extensions such as PostGIS it is ideal for integrating into GIS systems.
With this extension, it is possible to store and query spatial data and use them within other applications such as QGIS and Leaflet.
Leaflet is a lightweight JavaScript library used for creating interactive web maps. With it's simple nature and link to the PostgreSQL database we can create a map that receives live updates through GIS implementations.
Running this setup on a Raspberry Pi offers several benefits. The Raspberry Pi is cost-effective, energy-efficient, and compact, making it perfect for small-scale web mapping projects or IoT applications. With modern versions of Raspberry Pi, you can easily install PostgreSQL and PostGIS, and the system’s low power consumption makes it ideal for always-on applications. Additionally, the Raspberry Pi's flexibility and compatibility with Linux-based systems make it easy to configure as a local GIS server, allowing you to experiment with geospatial applications and host interactive maps on a low-cost device.
Most importantly, all of your data will be stored on the device within your own home or wherever you decide to set it up.
The following assumes your raspberry pi is set up and has ssh enabled. Remoting onto the pi from your device is done using ssh {username}@{pi_ip}.
You will need to then enter the password for the user on the pi and you will be able to access the command line on the pi.
The first step once in is to refresh the local package index using
sudo apt update.
Now install PostgreSQL and PostGIS onto the device using:
sudo apt install postgresql postgresql-contrib.
sudo apt-get install postgis.
Now that PostgreSQL is installed, we need to create a user, database and install the PostGIS extension.
When installing, a user postgres was created on the device. We need to switch to this user and connect to the new server:
sudo su - postgres
psql
Next a user is required for accessing the database rather than using postgres
CREATE ROLE {username} WITH LOGIN CREATEDB ENCRYPTED PASSWORD '{password}';
Then quit out of the database using \q.
Now switch to the created user and create a new database using:
createdb {database name}.
Now we are ready to enable PostGIS on our new database. To do this we need to connect to the database.
psql {database name} Followed by CREATE EXTENSION postgis;.
The database configuration file requires a few edits depending on how you want to use it. The two ways are:
To get started, check what version of PostgreSQL you have installed with:
ls /etc/postgresql/
This will print the version like this 13.
Now you will know where to find the configuration file for the following command:
sudo nano /etc/postgresql/13/main/pg_hba.conf
You will be navigating to the line that says host all all `host-machine-ip/32` md5
and changing it to the following:
host all all 0.0.0.0/0 md5
This will allow connection to the database from all devices. The next change is required in /etc/postgresql/13/main/postgresql.conf.
Now in here we want to set listen_address = ‘*’.
Once this is done, PostgreSQL will require a restart to apply our configuration with sudo systemctl restart postgresql.
In order to access the database from anywhere, port forwarding needs to be applied on the host network of the device. To do this, the local IP can usually be found on the router.
Use this IP in the web browser to access your configuration page and find port forwarding.
The configuration rule required is as follows:
| External Ports | Internal Ports | Protocol | ||
|---|---|---|---|---|
| 5432 | 5432 | TCP | ||
Now the PostgreSQL server can be accessed using the public IP of the raspberry pi. If this is static, you're good to go without any further setup required.
If your IP is not static, as is usually the case for home routers, a dynamic DNS is required. For this we can run a script which will contact a provider with the current public IP address at fixed intervals.
The dynamic DNS will provide a hostname that will be used which will act as the IP.
For this I use DuckDNS, which is a free dynamic DNS service. First set up an account and add a domain. This url will be what is used to access the database externally.
DuckDNS provides a fast installation guide here.
Select Pi as the operating system and follow the commands required on the page. If all has gone to plan, on your page of domains your 'current ip' should have updated to the current public IP of the raspberry pi.
The database is now ready to be accessed through GIS software such as QGIS either on network or from anywhere depending on how you set it up.
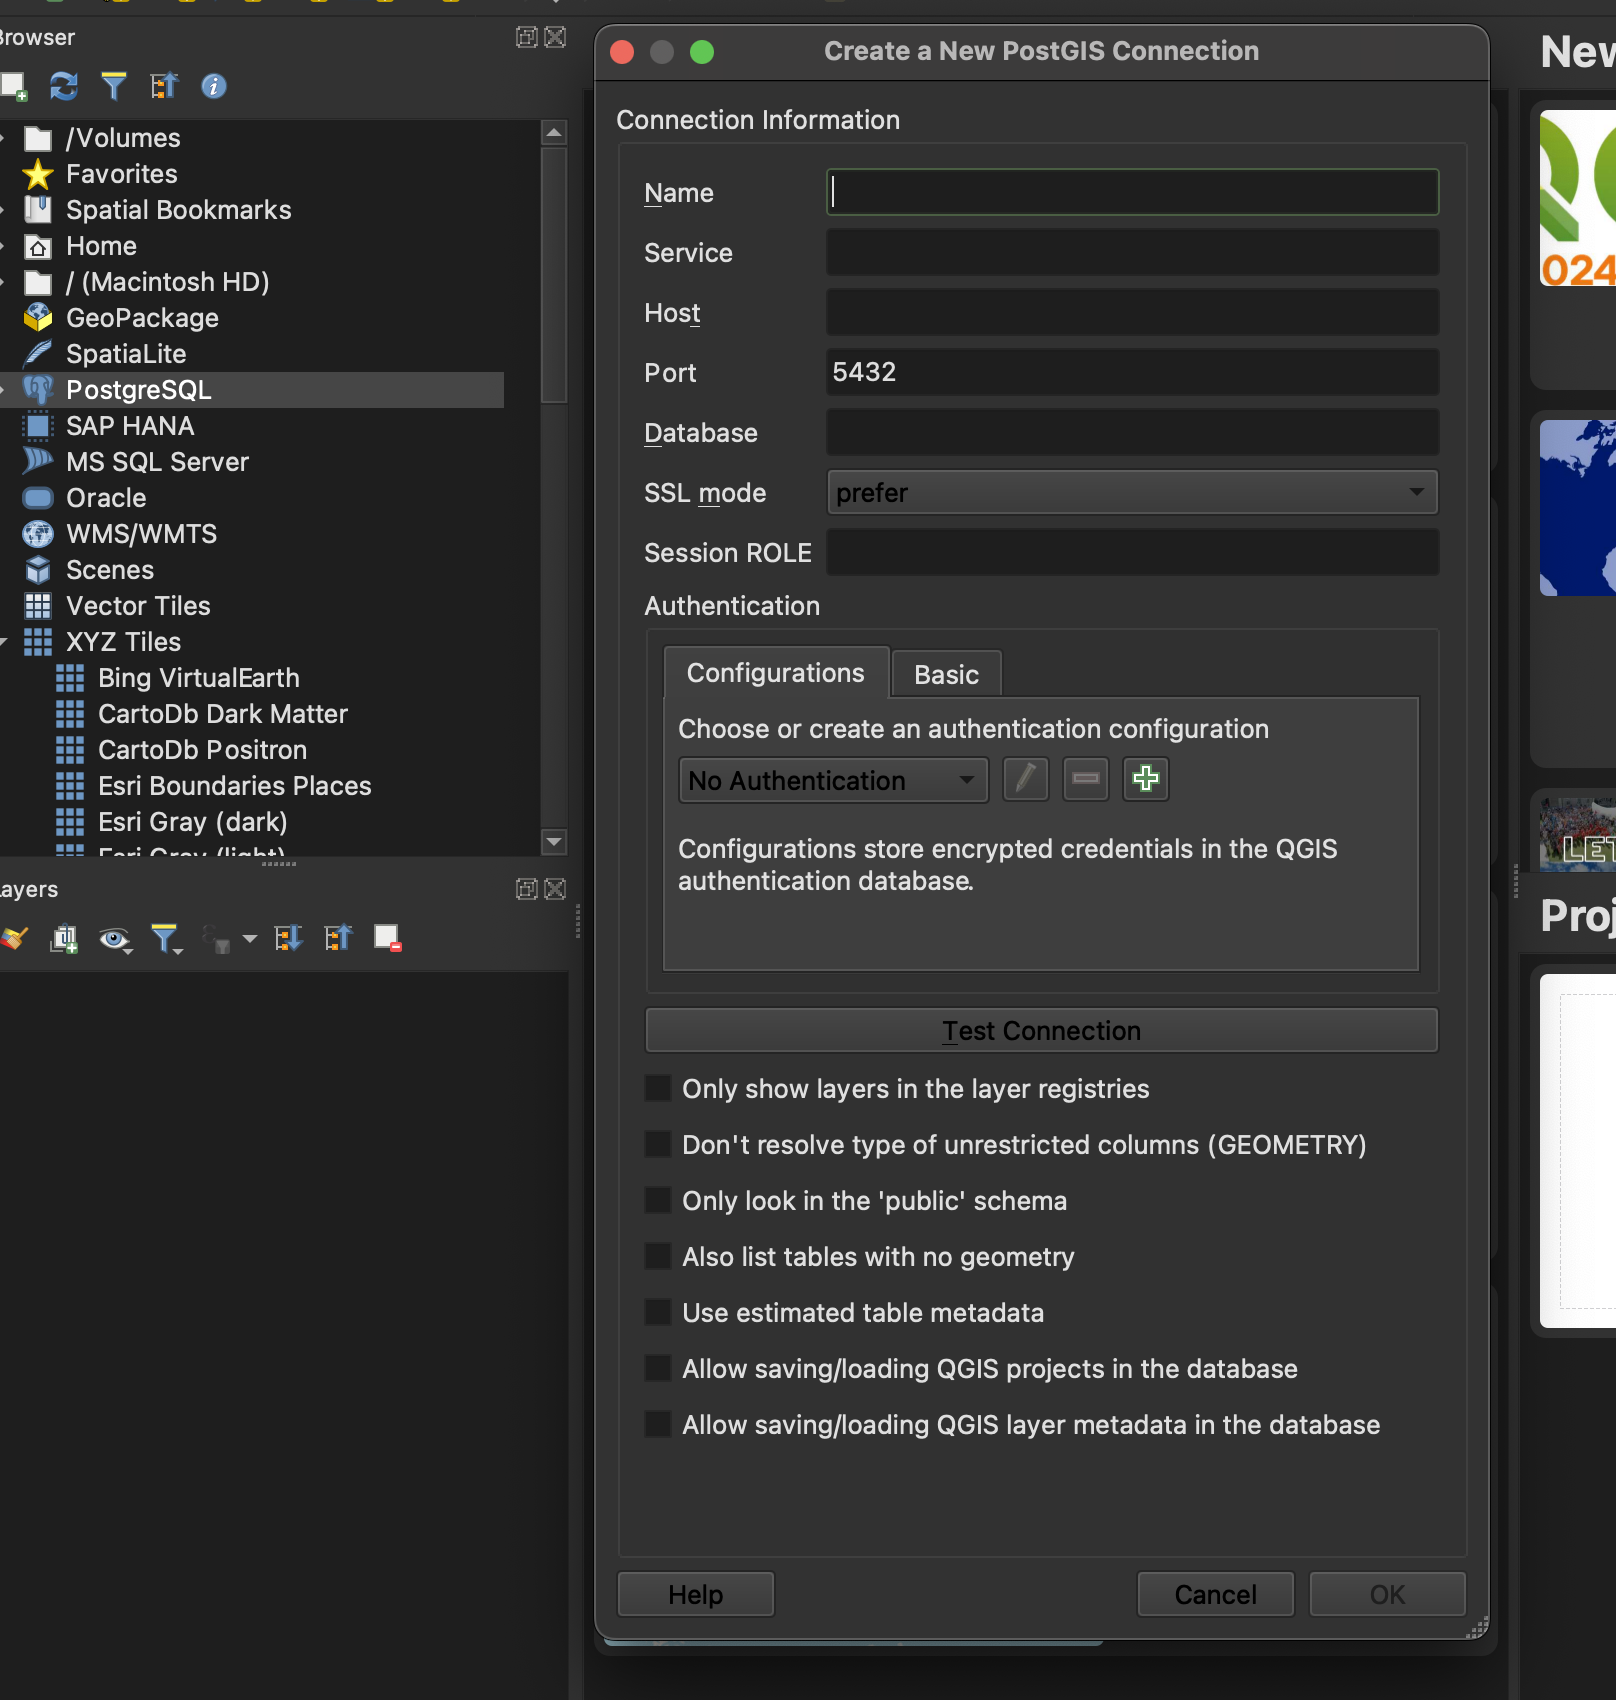
In order to add a connection to QGIS, right-click on PostgreSQL in the browser and select new connection. A window will appear where you can set a name for the connection and this is how it will appear within the browser. Service can be ignored, and for 'host' you want to use either your local IP, public IP or your dynamic DNS address. Database needs to be the name of the database you created earlier on. Within the'authentication' you can add your database account also generated earlier to allow access to the table. After this the connection should be added to your QGIS browser.

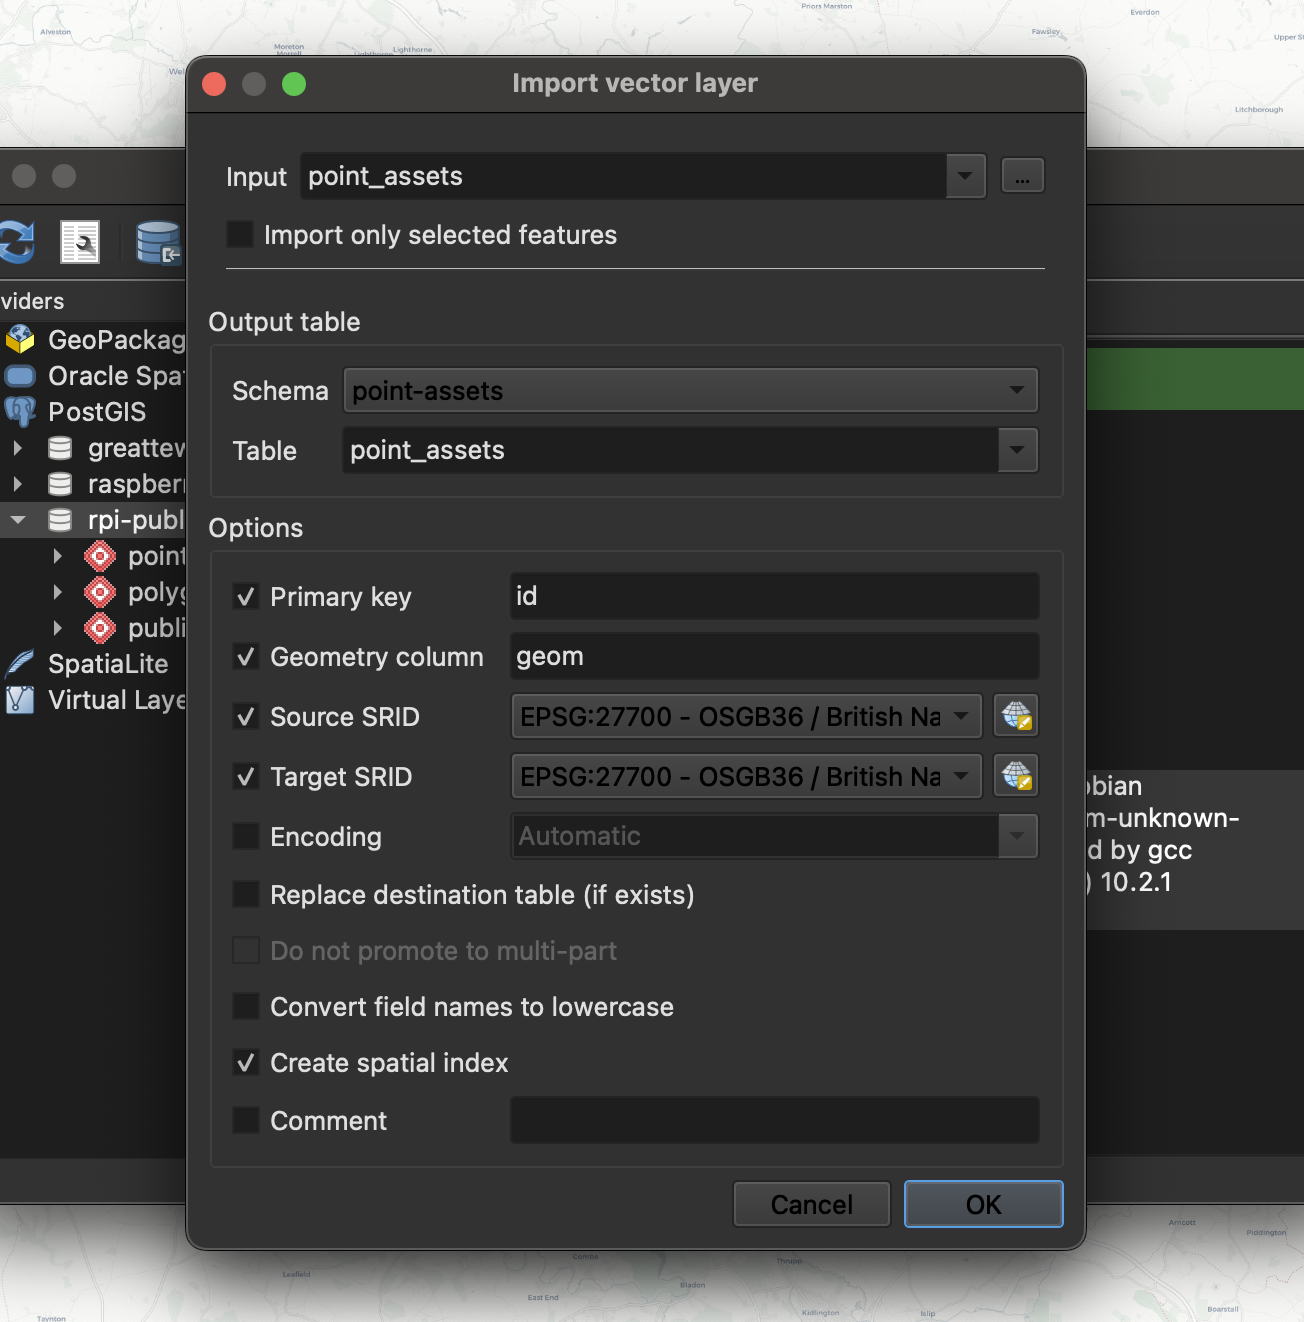
Within QGIS create whatever type of layer you want. This can either be a permanent layer or a temporary layer for this purpose as we will upload it into the Postgresql database. Once a layer is created it is ready to be uploaded. For this, do to the 'Database' tab at the top and 'DB Manager'. Your connection should show up within the PostGIS section. Click 'Import Layer' at the top which will open a menu for bringing the layer into the database.

For the input, select the layer you want to add. The schema is like a folder that will hold the tables of information you add to the database. Setting the 'Table' is like the layer name from now on.
Below this you can select the source SRID coordinate system for the layer. Source needs to be whatever you used in QGIS for the layer and target can be whatever you want, perhaps WGS84.
Create a spatial index to help with speeding up spatial queries.
When the layer has been added to the database you can remove the one which you created earlier as you will likely be using the layer from the database in place of it.
Now from the browser tab you can open the database and schema to navigate to your shapefile table. Add this to the project and points/shapes can be added and removed like normal. When done editing, using the 'save and stop editing' will also update the geometry and entries within the layer in the database table.
Let's say that this layer was being used by two users at once in two different instances of QGIS. User one adds a points and saves this edit. Now user two can use the refresh button in qgis and the update will come through 'live'.
This makes it powerful for working alongside others on different layers and seeing the updates in real time.